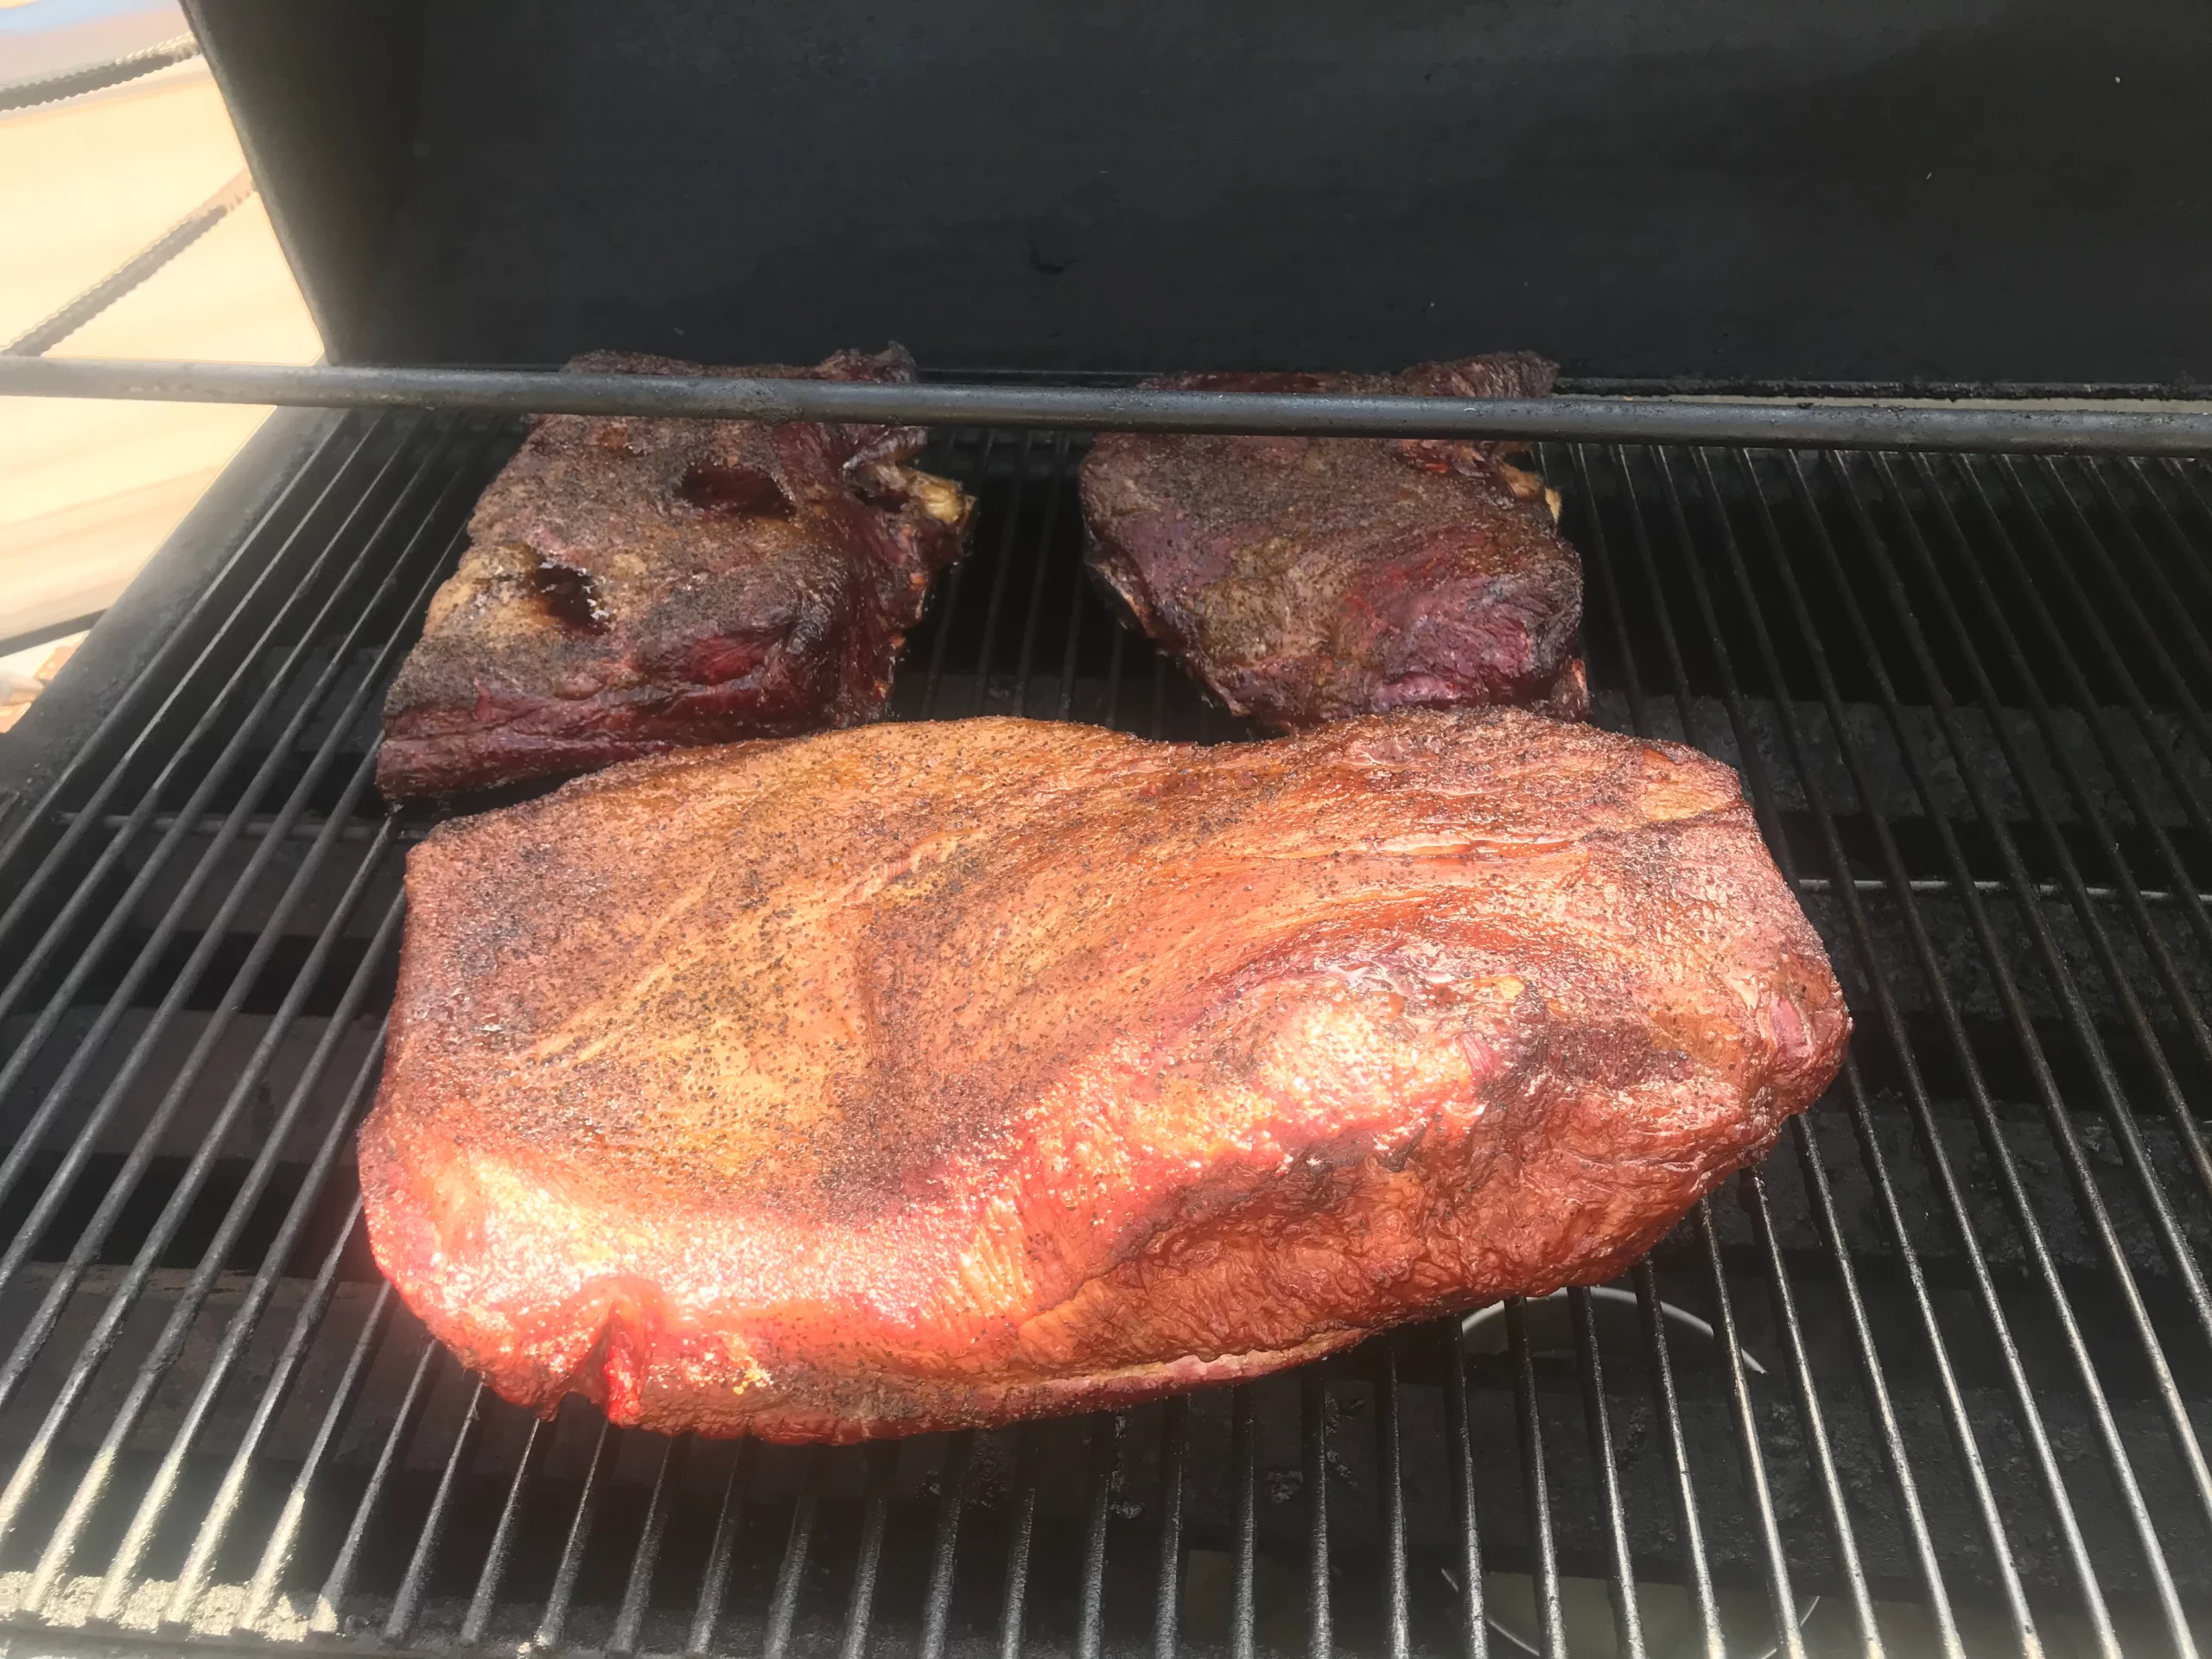
Brisket is the cut that separates a good backyard cook from a great one. It is large, it is tough, and it takes ten hours or more. It is also forgiving once you know which decisions matter. If you have smoked ribs or a pork shoulder, you already know how to hold a temperature and manage a fire. Brisket adds a few decisions of its own: how to pick the meat, how to trim it, when to wrap it, and how to slice it so the finished product is tender instead of stringy.
This walkthrough follows one cook in order, from the meat counter to the cutting board. If you want the broader background on cuts or rubs, those topics are covered elsewhere on this site, and this guide only goes into them where brisket needs something specific.
What to Look for When You Pick a Packer Brisket
A full packer brisket is the whole cut: the lean, rectangular flat and the thicker, fattier point, joined by a layer of fat, with the fat cap on one side. Buy this whole piece for your first serious attempt. A flat sold alone is leaner and dries out more easily, and it gives you no point, which is the most forgiving part. If you want more on how brisket compares with other smoking cuts, how to choose the right cuts of meat for smoking covers that ground.
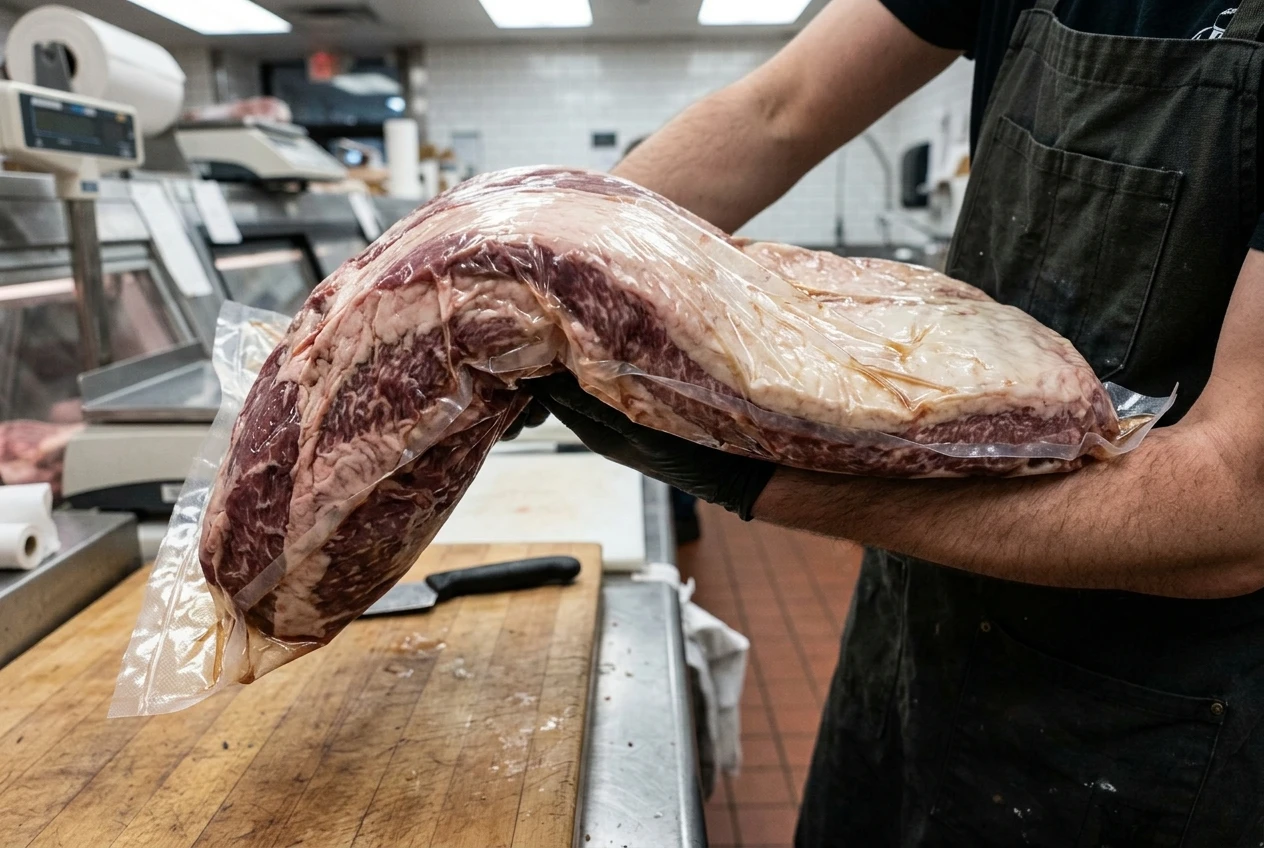
At the counter, check these things:
- Flexibility. Pick up the brisket from the middle, or drape it across your hands if it is in the bag. A brisket that bends and flops over easily has more tender muscle than one that stays stiff.
- Flat thickness. Look for a flat that stays fairly even in thickness rather than tapering to a thin tail. A thin end overcooks long before the thick end is done.
- Fat cap. You want a cap at least a quarter inch thick across most of the surface, so you have fat to trim and still leave some behind.
- Marbling. Look for white flecks of fat running through the meat, especially where the point shows at the edge. USDA Choice and Prime grades have more marbling than Select. Choose the highest grade the store carries that you are comfortable paying for.
- The package. A vacuum-sealed brisket with a lot of loose liquid, a sour smell when opened, or gray patches is not worth buying. Check the date on the label.
Ask the butcher if you can choose from several. Many counters stock only a few whole briskets, and the difference between them in thickness and flexibility can be noticeable. A packer commonly weighs somewhere in the low-to-mid teens in pounds, and a bigger one simply takes longer, so plan your timing around the piece you bring home.
Trimming the Fat Cap and Shaping the Flat and Point
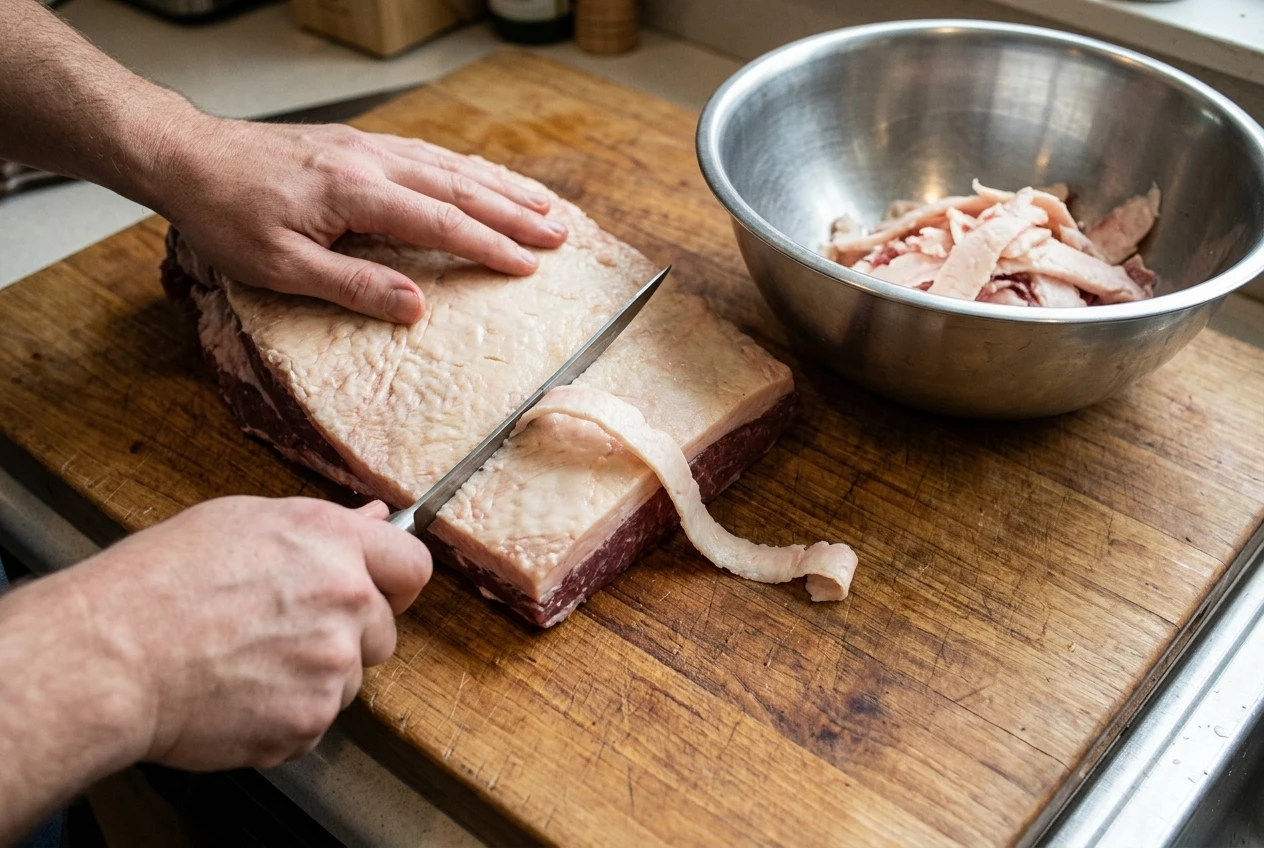
Trim the brisket straight from the refrigerator. Cold fat is firm, and a firm fat cap is much easier to cut cleanly than a soft one. Use a sharp, thin-bladed knife, and set the brisket on a large cutting board with the fat cap facing up.
Reduce the fat cap
Shave the fat cap down to about a quarter inch. That layer protects the meat and melts slowly during the cook, but fat thicker than that will not render fully and keeps the seasoning from reaching the meat. Cut in long, shallow strokes rather than digging into the meat. If you hit lean meat, stop in that spot and move on.
Remove the hard fat and round the edges
Flip the brisket and look at the point where the flat and point meet. There is a thick, hard deposit of fat between the two muscles. Cut away the outer, hard part of it, but leave the seam itself alone, because that is where you will separate the two muscles after the cook.
Then shape the brisket. Trim off any loose, dangling pieces of meat and fat, which burn and turn bitter. Round off sharp corners, and if the flat tapers to a thin tail, trim it back so the whole piece cooks at a similar rate. A smooth, evenly shaped brisket lets smoke and heat flow over it evenly, which gives you a more consistent bark.
Save every trimming. Put them in a bowl in the refrigerator, because the last section of this guide shows what to do with them.
Which side faces the heat
Whether to cook fat side up or down is an argument without a settled answer. The common reasoning is to put the fat cap toward the main heat source, so the fat shields the meat. In a smoker where the fire sits below the meat, that means fat side down. In an offset smoker where the heat comes across from the side, many cooks put the fat cap toward the firebox. Pick one approach based on how your smoker heats, and keep it consistent across cooks so you can tell what changes the result.
Seasoning the Night Before: Salt, Pepper and When to Go Beyond Them
Brisket is a large, dense cut, and salt takes time to move into it. Season it the night before, or at least several hours ahead of the cook. Overnight is better.
The classic Texas approach uses only coarse black pepper and kosher salt, in roughly equal amounts by volume. It works because the beef carries its own flavor, and the pepper builds a dark, crunchy bark. Use a coarse grind, often sold as 16-mesh pepper. Fine pepper can taste harsh and burns more easily.
Here is the process:
- Pat the brisket dry with paper towels. A dry surface holds seasoning better and builds bark faster.
- If you like, rub on a thin layer of yellow mustard or a little water as a binder. This helps the seasoning stick and does not add noticeable flavor after the cook.
- Apply the salt and pepper from a height, so it falls evenly. Cover the top, the bottom and all the sides, including the edges.
- Set the brisket on a wire rack over a tray and refrigerate it uncovered overnight. The surface dries slightly, which helps the bark.
The seasoning should look like a thorough, even coating, and you should still be able to see the meat under it.
If you want more than salt and pepper, garlic powder is the usual first addition, followed by paprika for color and onion powder for background sweetness. Keep the salt in the blend at about the same level as the pepper so the brisket is not under-seasoned. Sugar-heavy rubs are riskier on a brisket, because sugar burns over a long cook at smoker temperatures and can turn the bark bitter. If you want to build a blend, the art of preparing a dry rub covers the ratios and techniques in detail.
Setting Up the Smoker and Choosing Wood and Temperature
Start the smoker well before the brisket goes in, and let the temperature settle. Aim for 225 to 275°F at the grate where the meat sits. A common target is 250°F, which is a reasonable balance between a long cook and a bark that sets properly. Lower temperatures take longer, and higher ones finish faster but leave less margin before the flat dries out.
If you are still deciding what to cook on, gas versus charcoal smokers is a useful comparison. Both can produce excellent brisket, and the difference is mostly in how much fire tending you want to do.
Wood choice
Beef takes strong smoke well. Oak is the standard choice for brisket because it burns cleanly and gives a steady, moderate flavor. Hickory is stronger, and pecan is slightly sweeter. Mesquite is very intense, and it can turn the meat acrid over a long cook unless you use it sparingly or mixed with oak. Fruit woods like cherry or apple are mild, and are best used as an addition for color rather than as the main wood.
Clean smoke
The smoke you want is thin and pale blue, almost invisible. Thick white smoke means the fire is starved of air or the wood is smoldering, and it leaves a bitter, sooty taste on the meat. Give the fire enough airflow, add small splits of dry wood rather than large green pieces, and keep the vents open enough that the fire burns steadily.
Probes and placement
Use two probes if you can. Put one at grate level near the brisket to read the actual cooking temperature, since the built-in lid thermometer is often off by a noticeable margin. Insert the other into the thickest part of the flat, going in from the side along the grain, with the tip in the center of the meat and away from the point. If you need a thermometer, the list of tools every backyard pitmaster needs covers what to look for.
Put the brisket on with the fat cap oriented as you decided earlier. A water pan in the smoker adds humidity and steadies the temperature. Then leave the lid closed. Every time you open it, you lose heat and add to the cook time.
Planning the clock
Brisket takes anywhere from about an hour to an hour and a half per pound at these temperatures, and individual briskets vary a great deal. Plan on more time than you think you need. A finished brisket holds well in a cooler for hours, but a brisket that is not done when guests arrive cannot be rushed. Many cooks start overnight for a dinner the next day.
Riding Out the Stall and Deciding When to Wrap or Use a Foil Boat
Somewhere between 150 and 170°F internal, the temperature stops rising and can stay flat for hours. This is the stall. Moisture is evaporating from the surface of the meat, and the evaporation cools it as fast as the smoker heats it. It is normal, and the meat is not ruined. Raising the smoker temperature in a panic is the usual mistake.
You have three options.
Wait it out. If you do nothing, the stall eventually ends, and you get the thickest, darkest bark. This takes the longest and gives the driest surface, so it suits cooks who value crust over speed.
Wrap in butcher paper. Paper holds in some moisture while still letting steam escape. The stall passes faster, and the bark stays fairly firm. This is the usual compromise.
Wrap in foil. Foil seals in moisture completely. It speeds the cook the most, but it steams the surface, so the bark turns soft and the meat can taste more like pot roast.
The foil boat
A foil boat is a middle path. Fold a sheet of heavy foil under the brisket and up the sides, and leave the top open. The boat shields the underside from the heat and holds in rendered fat, while the top bark stays exposed to the smoke. It slows the bottom from drying out without sealing the whole piece.
When to wrap
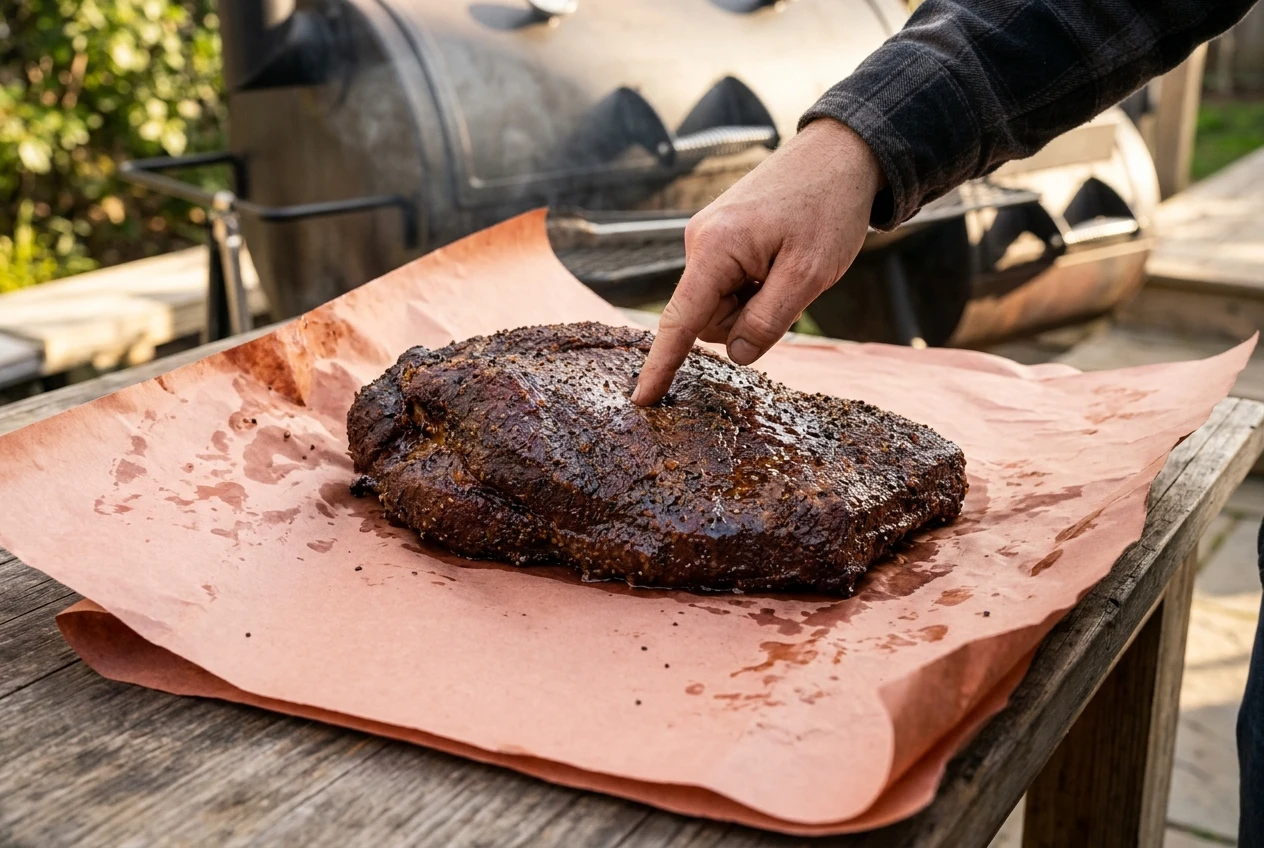
Do not wrap by temperature alone. Wrap when the bark is set. Press the surface with a finger: if the seasoning does not smear or rub off, and the color is a deep mahogany, the bark has formed. This usually happens in the range of 165 to 175°F internal, but it depends on your brisket and your cooker. Wrapping before the bark sets leaves it pale and mushy.
If you spritz, use a light mist of water, apple cider vinegar or a mix every hour or so after the first few hours. This keeps the surface from drying out too early. Spritzing is optional, and opening the lid too often costs more heat than it adds.
When you wrap, close the paper or foil tightly around the meat, return the probe to the same spot, and put it back in the smoker.
How to Know It’s Done: Probe Tenderness Over a Number on the Thermometer
The final internal temperature of a brisket is usually between 195 and 205°F. That range is a signal to start checking, not a finish line. Two briskets cooked to the same number can be completely different in tenderness.
The test is the feel of the probe. Push a thermometer probe or a thin skewer into the thickest part of the flat. When the brisket is done, the probe slides in with almost no resistance, much like pushing into a jar of peanut butter or a stick of softened butter. If you feel any tightness or grab, it needs more time.
Check several spots, especially the thickest part of the flat and near the edges. Different areas finish at different times. The flat is the leaner part and tends to reach tenderness a little after the thermometer hits 200°F. The point has more fat and is more forgiving.
If the brisket is not tender yet, leave it in and check again every 20 to 30 minutes. A brisket pulled too early is tough no matter how long it rests. A brisket left a bit longer is far less of a problem than one pulled early.
A gentle jiggle check helps too. Lift the brisket from the middle with tongs or gloved hands. A finished brisket sags and wobbles like a set gelatin dessert.
Resting, Slicing Against the Grain and Separating Point from Flat
Rest the brisket for at least an hour, and two is better. During the rest, the temperature evens out through the meat and the juices redistribute, so they stay in the slice instead of running onto the board. Cutting too soon is one of the most common ways to lose a good brisket.
Pull the brisket from the smoker and open the wrap for a few minutes to let steam escape and stop the internal temperature from climbing. Then close it again, wrap it in a clean towel and put it in an empty cooler with the lid closed. It will hold safe, serving-ready heat for several hours. For food safety, keep it above 140°F until you cut it.
Separate the point from the flat
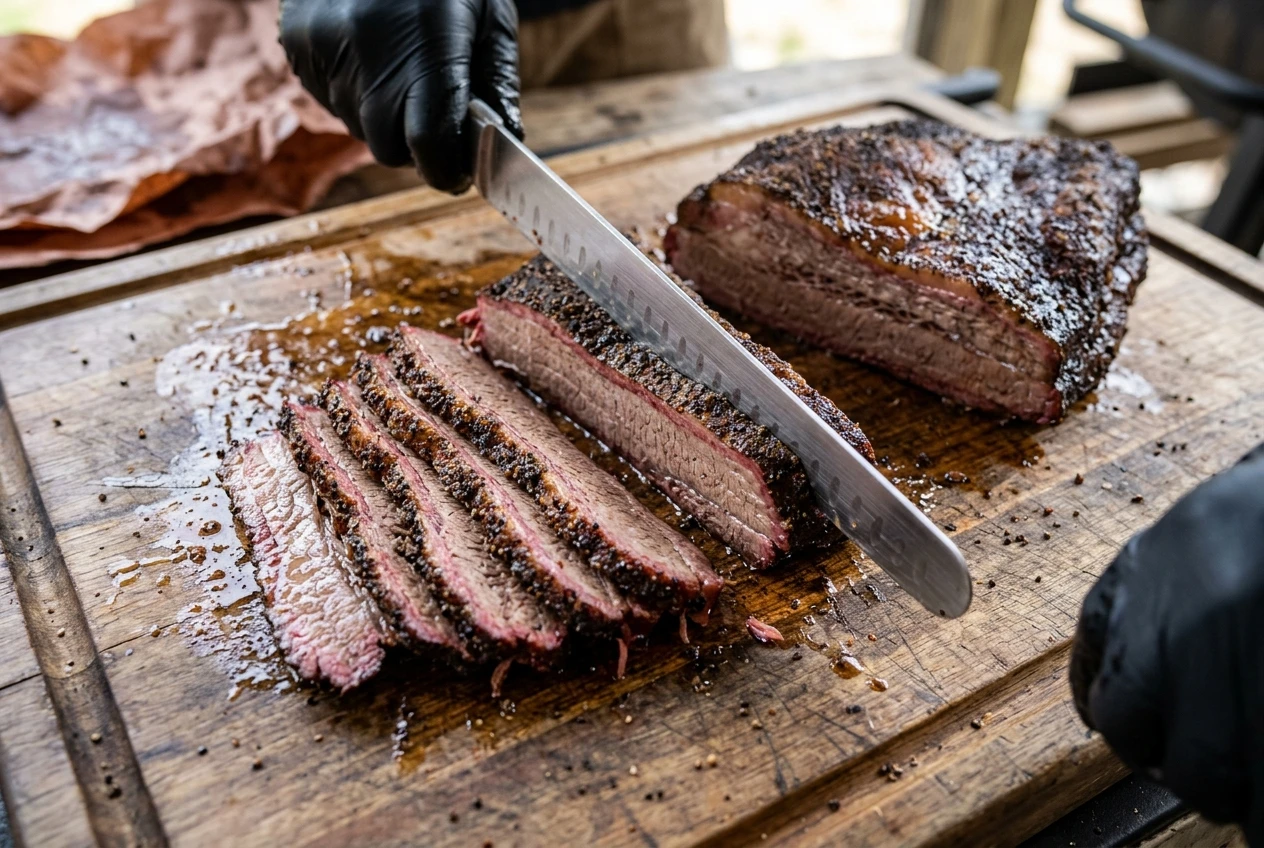
When you are ready, unwrap the brisket and find the fat seam between the two muscles. Run your knife along that seam, using your fingers to pull the muscles apart where they resist. The point comes away as a thick, marbled piece, and the flat is a long, lean slab.
Slice against the grain
Muscle fibers run in a single direction, and slicing across them shortens the fibers so each bite is tender. Slicing with the grain leaves long strands that chew tough, even in a perfectly cooked brisket.
For the flat, the grain runs lengthwise. Turn the flat so the grain is perpendicular to your knife, then cut slices about the thickness of a pencil, roughly a quarter inch. Use a long, sharp slicing knife and long, smooth strokes instead of sawing.
The point is trickier, because its grain runs in a different direction from the flat’s. Turn it and look at the surface before the first cut. Slice it a bit thicker, or cut it into cubes for burnt ends.
A good slice holds together when you lift it and bends over your finger without snapping. If it falls apart at the touch, the brisket is overcooked, which is better than undercooked, and it will still taste excellent.
Common Brisket Mistakes and How to Fix Them Next Time
Most brisket problems come from a small number of causes.
- Dry flat. The usual causes are a smoker running too hot, overcooking, a fat cap trimmed too thin, or too short a rest. Next time, check for tenderness earlier, keep more fat on the cap, and rest it longer.
- Tough meat. The brisket was pulled too early. Do not trust the thermometer number alone, and keep probing until it slides in without resistance.
- Bitter or sooty taste. This comes from dirty smoke. Use dry, well-seasoned wood, give the fire more air, and wait until the smoke thins to pale blue before putting the meat on.
- Soft, soggy bark. The brisket was wrapped before the bark set, or sealed in foil. Wait until the surface is firm to the touch, or switch to butcher paper or a foil boat.
- Burnt thin edges. The tail of the flat cooks faster than the rest. Trim it back before the cook, or fold it under.
- Slices that fall apart or chew like rope. If they chew like rope, you sliced with the grain, so check the direction before every cut. If they fall apart, the brisket was cooked a little too long.
- Meat that runs dry on the board. Rest it longer, and cut only what you plan to serve right away. A whole, unsliced piece keeps its moisture much better than cut slices.
Keep a short note after each cook: the weight, the cook temperature, the wrap time, the time it finished and how it tasted. After two or three briskets, those notes will tell you more than any recipe.
What to Make with the Trimmings
The fat and meat you trimmed off are useful, and a lot of cooks consider them the best part of the process.
- Beef tallow. Cut the fat trimmings into small pieces and render them slowly in a pot over low heat, or in a low oven, until the fat melts and the solids brown. Strain it through a fine mesh into a jar. Tallow keeps in the refrigerator and is good for frying potatoes, searing steaks, or adding a spoonful inside the wrap on your next brisket.
- Ground beef blend. Lean scraps with a little fat can be chopped or ground and mixed into burger meat, which adds richer beef flavor and moisture.
- Chili and beans. Small pieces of trimmed meat can be cooked in a pot of chili or beans, where the fat adds body and flavor.
- Burnt ends. From the cooked brisket, cube the point, toss it with a little sauce or rub, and return it to the smoker for an hour or so, until the edges caramelize.
- Leftovers. Chopped brisket turns into tacos, hash, quesadillas or sandwiches the next day. Reheat it gently, covered, with a splash of broth or tallow so it does not dry out.
A packer brisket is a large piece of meat, and with the trimmings and leftovers it can feed a table more than once.